


Step by step, we help you give your (existing) model houses a realistic look. These steps are practical and applicable to everyone with materials that every modeler has at home. No airbrush or other spraying equipment. A few brushes, painter’s tape and paint will do.
In this tutorial we will use Vallejo’s “Wood & Leather” set (number 70.182). Of course, other brands and colors are also applicable.
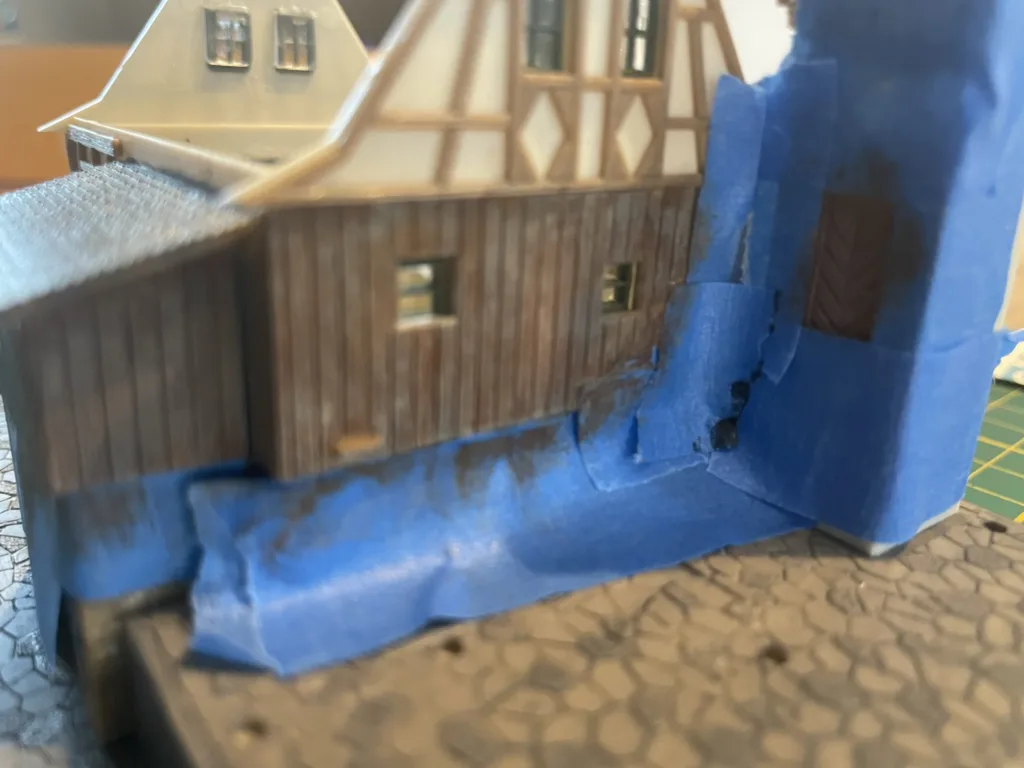
preparation: cleaning and masking
An existing model? The first step is to clean the model. To do this, use an (old) soft brush and a small hobby knife. Make the building dust-free. Otherwise, the paint will mix with the dust and create unnatural “clumps” in the paintwork. Then a sharp knife is used to remove all irregularities from the model, including previously applied floral parts.
masking
This step repeats for each surface being painted. Tape off the parts that should not be touched by the paint. For this, use the more expensive but so much better painter’s tape from 3M, for example.
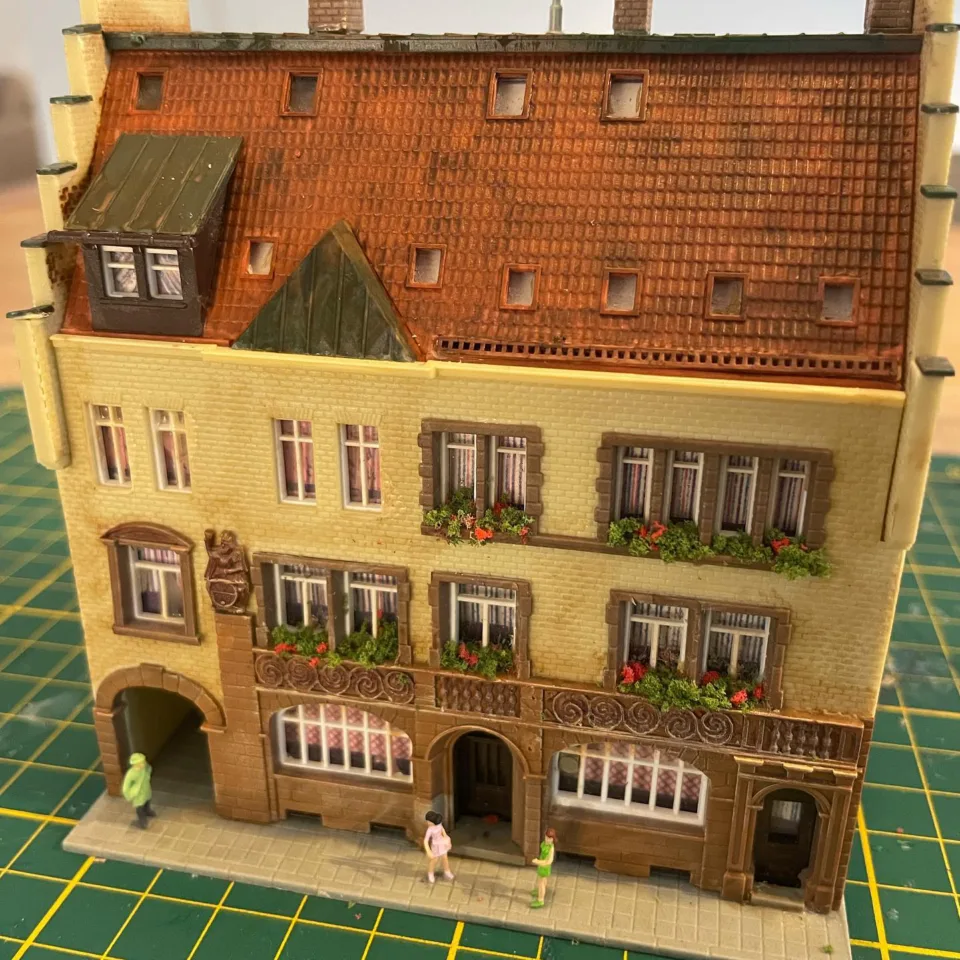
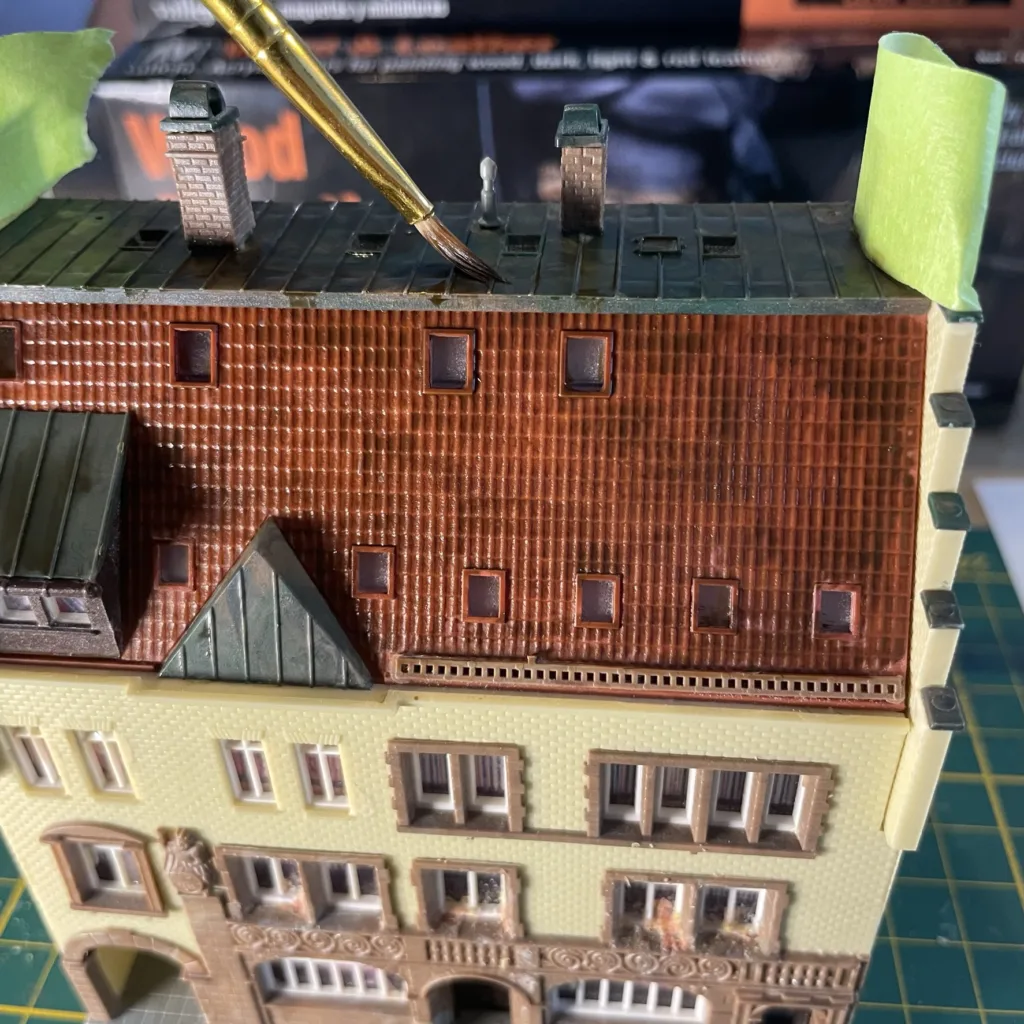
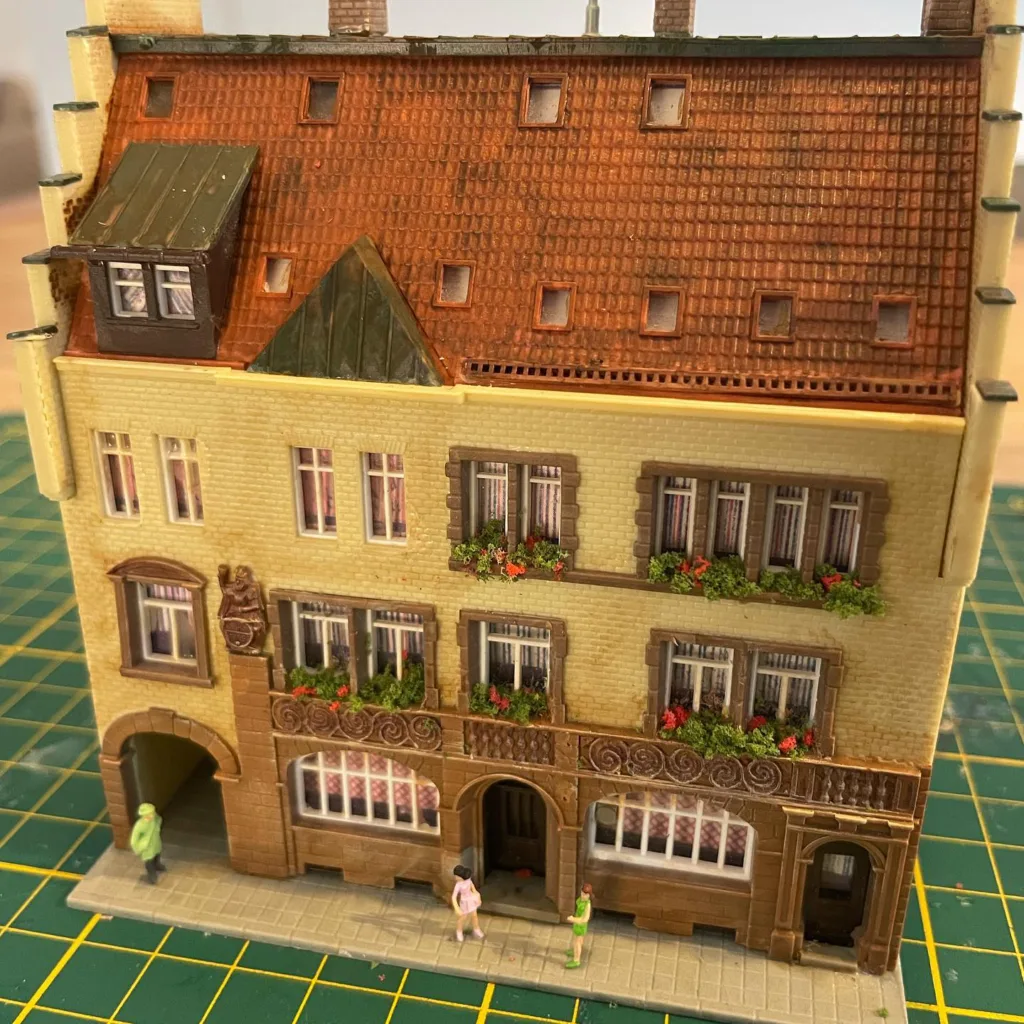
step 1: getting started: the roof
Now we are really getting started. The roof is undeniably is the most eye-catching plastic part of the house due to its large surface area. When this part is edited, the greatest effect is achieved. This can be done in two ways:
- Paint the roof in the original color. This is done by mixing colors to create a very similar color. With that, the roof is painted. It does not have to be opaque. Just by leaving random pieces open, a play of colors is created on the roof that looks natural.
- If the color of the roof is already good or, for example, has already been colored by the manufacturer, we use Vallejo “Game wash 73,200 Sepia.” The paint has the ability to dry in dark and light areas which gives a very natural effect. Apply this paint almost opaque.
Brushes with soft bristles are a must and a fine tip for the eaves.
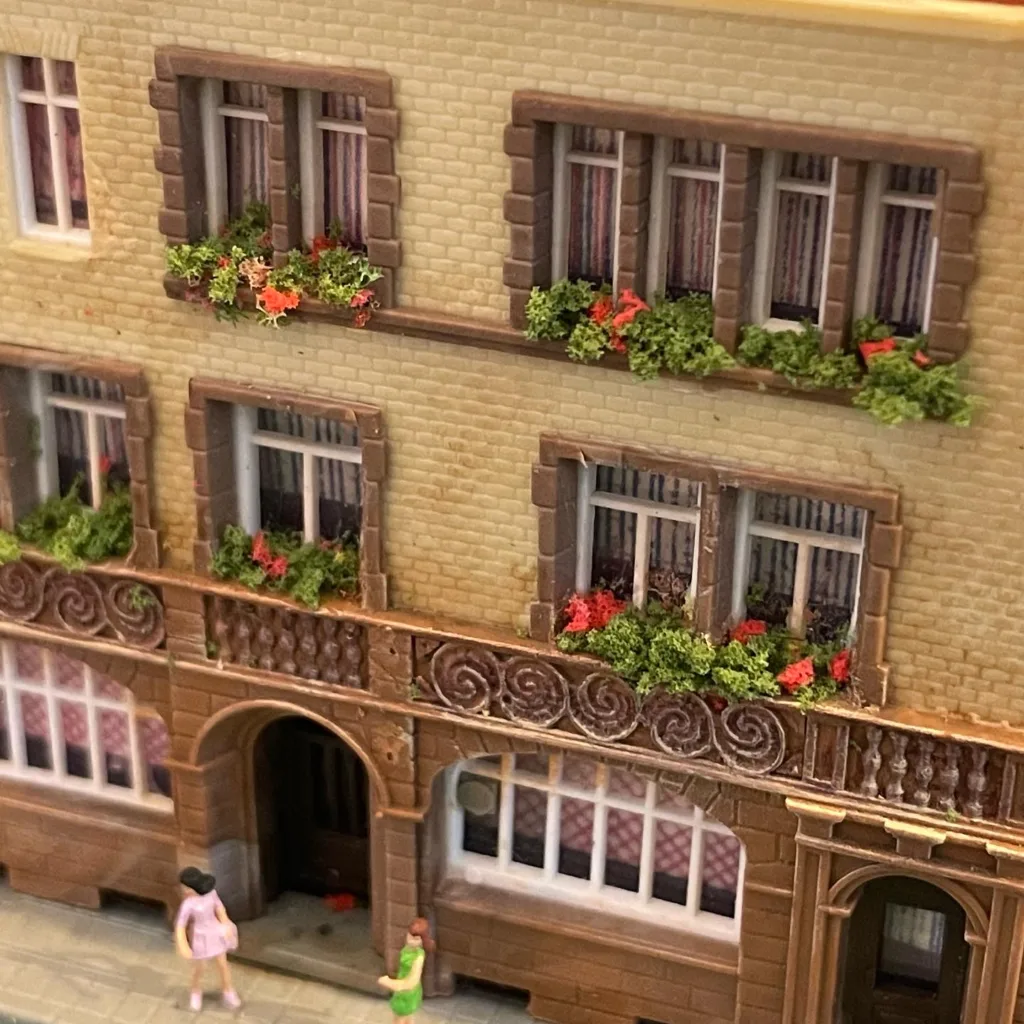
step 2: add wood and stone accents
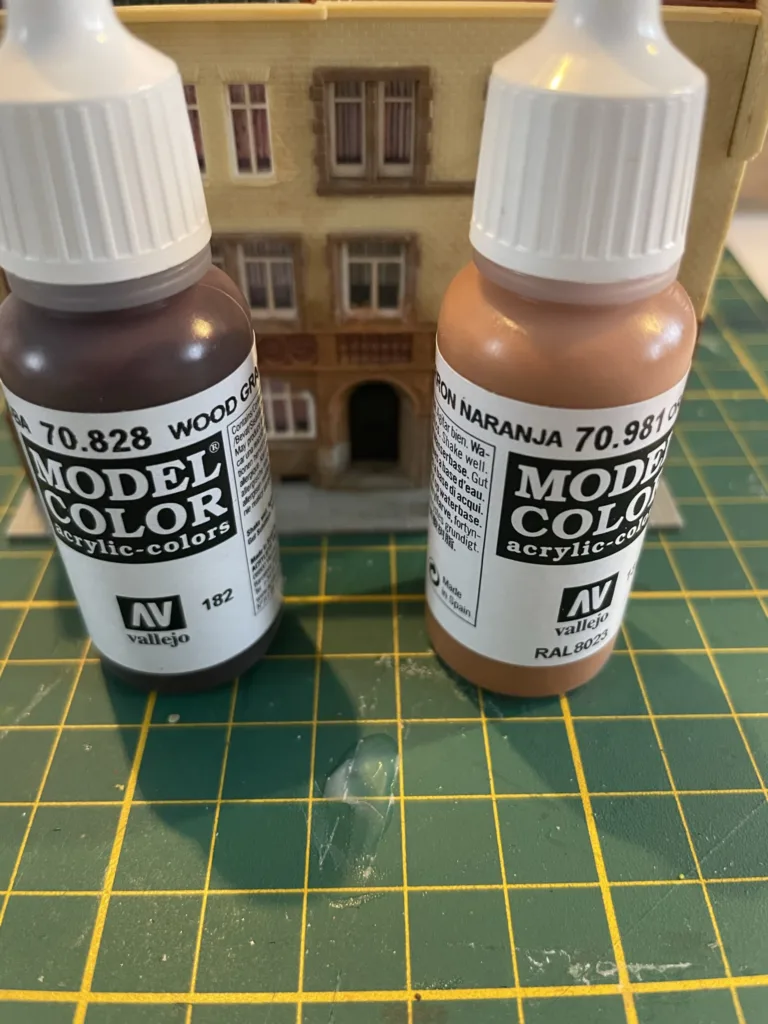
Because many houses are modeled after German models, you often find wood on the model. For example, as latticework or small accents. In our example, a male sits on a beer barrel. Available from Vallejo is set 70,182 to paint wood. From this set, we take “70.828 Wood Grain” and “70.981 Orange brown” and mix them to taste. Mixing is done drop by drop. For scale N, a drop is enough to paint one side of a building. The mixed color is applied to the wood. Again, not covering. Make sure you continue to see any grain or joints. Too much applied? Grab a dry brush and wipe it off.
Play with the mixing of the paint to simulate different light and dark woods. Too dark? Even then, grab a dry brush to remove the layer. If you want, you can also apply multiple layers. See part 1 of our tutorial.
Another typical German principle are the sandstones placed along doorways. Basically, you can treat these with the same colors. A little more “70,981 Orange brown” can then make just the difference.
step 3: apply light accents
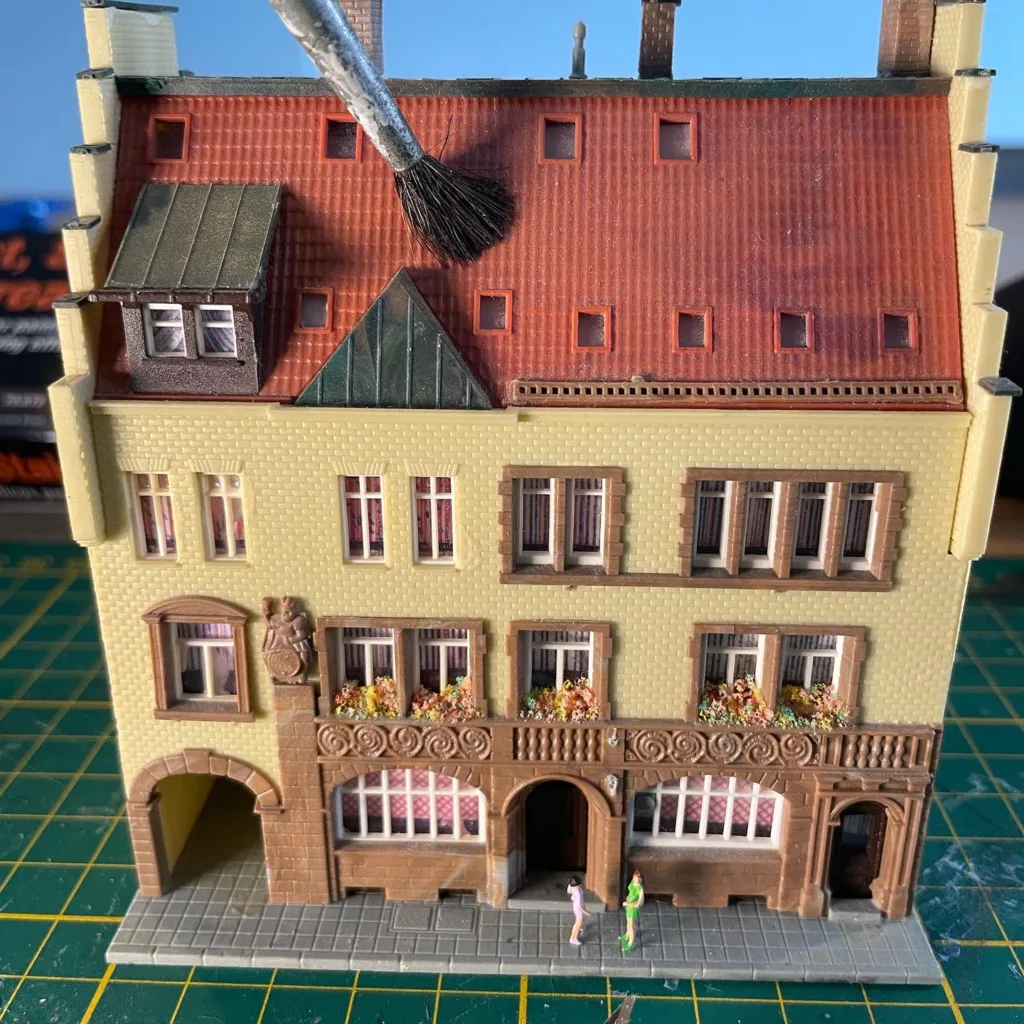
All the woodwork and bricks painted? Then it’s time to add light accents. Even if, for example with a timber-framed cottage, you haven’t. These light accents give the effect of “weathering” (aging) of the materials.
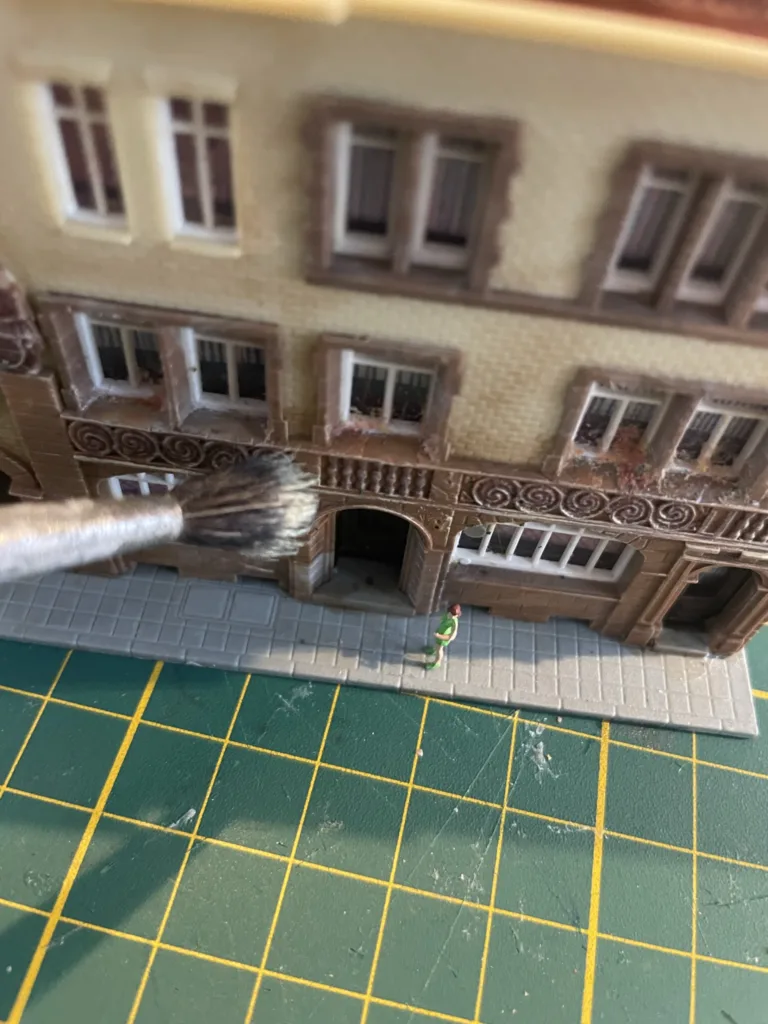
We use a preferably old, soft, brush. Take one drop of “Vallejo 70.847 Dark Sand.” Lightly put the brush in the paint. And then brush the paint onto it, on a piece of paper. So long until there is almost nothing left on it. Take the building and superficially brush over the parts you want to treat. You will see small light smudges appear. That’s the effect you want. Do you see too much? Then quickly wipe away with a dry brush or finger. And once again “smear” the brush on paper. The trick here is to apply it as lightly as possible.
The effect of these accents is enormous.
step 4: the walls
Now the exterior walls remain. It depends on the type of building. For a white bungalow, use a different color scheme than a brick building. Vallejo “Game wash 73.200 Sepia” or “70.923 Japanese Uniform” can also be used well for this. Apply very lightly. Make sure the paint is well distributed on the wall so you don’t see where you started.
For all buildings, the underside has the most contamination. Where rain makes dirt splash off the ground. With a fine brush, therefore, apply a dark border around the building.
step 5: finishing
The final step is finishing. Small floral sections are added where necessary. Use a drip of wood glue and sprinkle the flowers on top, these are often included with construction kits. And bring the building to life with some small inhabitants.
Of course, much more can be tackled about the building. Experiment with that. For example, tackle downspouts and gutters by painting them a slightly darker color. Prime the paving stones or patio with a few swipes of “70,939 Smoke” and wipe them away again so that only the joints are colored. The possibilities are endless.
Used in this tutorial:
- Vallejo 70.182, price about 23 euros
- Brushes set, with minimum thickness ‘2’, 10-15 euros
- 3M Masking Tape Blue, 6-8 euros
- Hobby knife Revell, 6-10 euros
This article is also available in:
![]() Nederlands
Nederlands